Saturday, November 28, 2015

Nativity Scene

This is my post at the
You are welcome to use my discount code
DIANE-10 anytime to save 10% on your order.

Hi, Diane with you today!
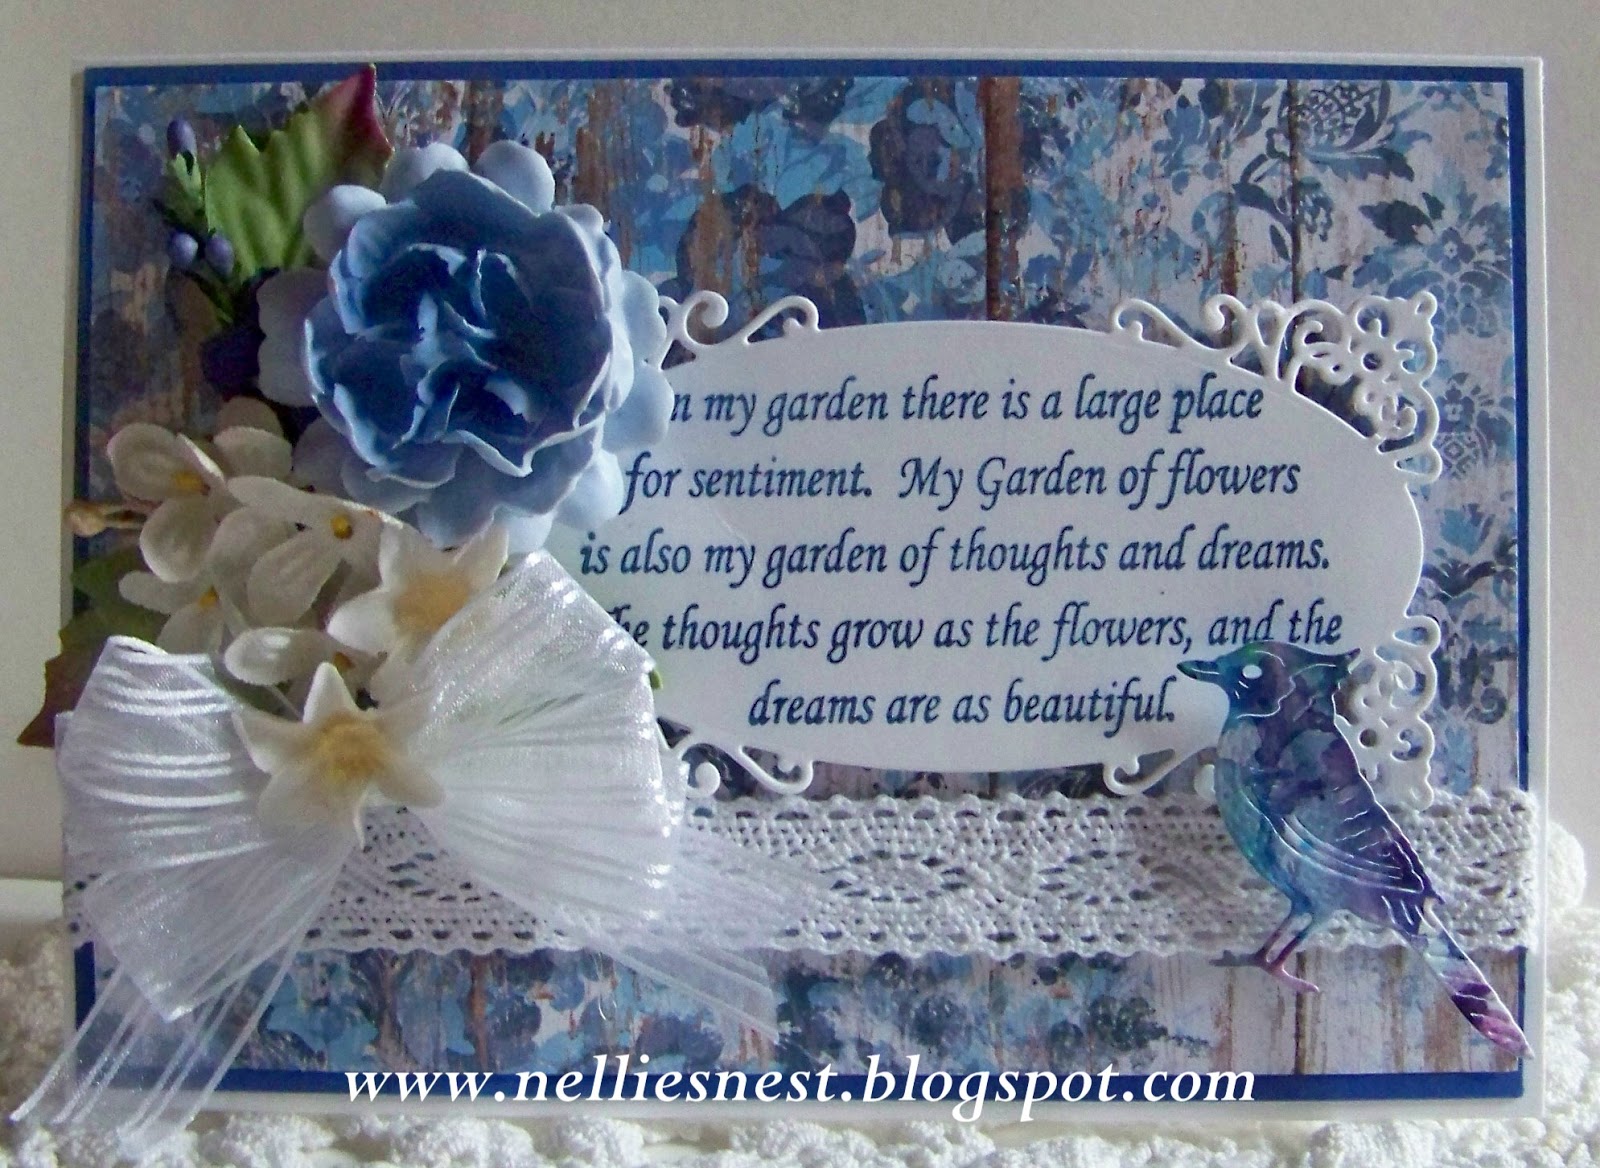
For my card today I started with a pretty blue background 
I used white card stock and cut a center out
with Spellbinders Nested Medallion Label Dies.


I then used a Memory Box Stars, Stardust Stencil
with Dreamweavers Metallic Gold Embossing Paste.

The scene was cut from Die Versions Nativity Border.
Cutting it once from white card stock and a second time
from a black craft foam.

To finish I simply added Aztec Gold Glitter
and a pretty sheer ribbon/bow.

Thank you for visiting with me today!

Friday, November 27, 2015

Garden of Thoughts and Dreams

So, did you all get enough Thanksgiving dinner yesterday??
Are you out "Black Friday" shopping?
Not me, I wait until AFTER for the BIG sales...lol!
So I am in my creative room, drinking a nice hot cup of  caffeine
not missing the crowds of the people that spread their germs
because even though they are sick they just can't miss that bargain....lol!
So NOT worth it... (and it shows my OLD age.lol)!!

That brings me to today's post for Fussy and Fancy.

Annie is our hostess and she has chosen the theme
"WORDS" -  it's all about the sentiment.

Our Sponsor is Live & Love Crafts.


I made a rather large card as I have a large sentiment.
from B-line Designs.  The sentiment was stamped on
a Spellbinders die cut and stamped with SU Brilliant Blue ink.
I think this is the first time I have used this color!


The background paper is from The Paper Studio called 
Country Roads..wow, I just love it!
I added a piece of crochet lace over the top from RRR,
and a bird using Cheery Lynn Designs winter Birds die.
All this was mounted on SU Brilliant Blue card stock.

Flowers and leaves were added from my stash along
with more ribbon from RRR...and it is my last"snippet" of it!

Now "pop" on over to the Fussy and Fancy blog and see what
the other FAF girls have to show you...it's fabulous!

This is "my" last post for my team this year....
but our team will be back in January 2016 with
more spectacular projects!!


Thursday, November 26, 2015

Trim The Tree

This is my post on the Dies R Us blog today!!

Happy Thanksgiving from the entire
Dies R Us Team!
We all wish you a very blessed and wonderful Holiday!!

I am still creating Christmas cards with all the
many, many dies to choose from at Dies R Us.


I made a background using 
Sue Wilson Designs New York Collection Union Square.
A layer of red card stock and a pretty piece of
Martha Stewart designer paper was added next,
with 2 cardinals cut from Impression Obsession Birch Trees,
(these little cardinals come with the tree dies).

The Christmas tree die is a favorite....
wait until I tell you about this die!
The underneath die is Dee's Distinctively Tree Silhouette.
The overlay is Dee's Distinctively Christmas Tree Overlay #4.

Now are you ready for the fun part?
Once you purchase the tree silhouette,
there are 4 'different' overlays to choose from
AND
there is another tree to use
AND
3 sets of tree decorations to choose from....
I told you this die is a fun one!!

Now, I am sure you are stuffed from
your turkey dinner,
so why not kick back and look at all the
dies to choose from!!

Visit us here Monday~ Friday for lots of inspiration
using the dies......
Visit our challenge blog and enter for a chance to win!

Have a great day!!
Diane

Wednesday, November 25, 2015

Have A Holly Jolly Christmas

It's already that time again for a new challenge over at 
This time around Vicki is our hostess and the theme is
In The Meadow We Will Build A Snowman


I had a lot of fun making this card!
Last year I won this snowman stamp and a marker set
from Stampendous.
The stamp is called Jumbo Top Hat Snowman,
isn't he just the "coolest" (pun intended..lol).
The background paper I used was from the scrap bin.
but I have to tell you, I cut it the wrong way...
I had wanted it to go across, not up and down,
Because it was a scrap, there was not more to cut
so it is what it is...lol!


I colored Mr. Snowman with some Copics
and then used glitter pens to make him sparkle,
which I am sure you can't see IRL!


That neat-o bow is from Cheery Lynn Designs
called Pretty Pretty Bows.
The snow banks are cut with Lawn Fawn dies
and "iced" with some Star Dust Stickles.


The sentiment is from SU Christmas Punch set
and of course punched out with the SU matching punch.
I hardly ever use my punches anymore
so it was kind of fun to do so!

Pop on over to The Sisterhood and see what my 
creative "sistahs" have for you...
hey, why not join in the challenge with us!

PS:  There is a new challenge blog coming to town, too
you can read about it at the top of my blog!!

Entering the following challenges:
Cheery Lynn Designs .... ATG
My Time To Craft .... Let It Snow
Christmas Card Challenge .... ATG

Tuesday, November 24, 2015

Joy Love & Peace

I sure seem to be getting a head start on my Christmas cards this year.
Having an endless amount of beautiful digitals from
Crafty Secrets to choose from sure makes it easy!


I printed a wonderful deer from the Deer Christmas Digital Stamp Set 124
I kept it a bit simple, but it was well glittered with a green glitter pen.
The words are outlined as well with a silver glitter pen.
The deer was colored in with Copics.


I added a bit of glitter holly at the top and a red cardinal.
A bow and a vintage button finished it off.

Take a peek over at the Crafty Secrets online store, 
it is a very quick and reasonable way to get several
Christmas cards sent out!

plenty of inspiration there!!

Trim The Tree

This is my post on the
for our this weeks challenge which is
ornaments and the inspiration photo below.
You are welcome to use my discount code
DIANE-10 anytime for 10% your order.


Hello, Diane with you today.
This week our challenge is all about ornaments.
There are so many beautiful ornament dies to choose from,
trust me, I know as I own several
and what a hard choice to decide which one I wanted to use.

I ended up choosing this beautiful and intricate
Memory Box Corby Ornament.
It was cut from a cordinations green glitter paper.
I cut it a second time using red for the cardinal.


This ornament die has a separate back you can purchase
if interested, Memory Box Drop Ornament,
it fits perfectly for the back layer.
I used Pearlized Esse White Metallic paper for the ornament backing

The ornament was attached to  an Impression Obsession Pine Branch.
I added a Snow Marker to the branch,
as you can see, I got a little carried away with the snow!

The snowflake paper behind the ornament was cut using a die from
I know it is difficult to see in the photo,
but this was then embossed with Quilt Blocks by Darice

I added an embossed under panel on red card stock
and a pretty red bow to finish it off.

Thank you for visiting with me today!


Sunday, November 22, 2015

Cold and Snowy

Well, Mother Nature sure had a heyday with us this weekend.
We went from 50-60 degree weather to THIS!!

These were all taken about 7:30 this morning....
totally beautiful
but also a COLD 20 degrees with about 8" of the wet "stuff"!!


The picture below...see the "house"
well guess what?
There is NO house, just woods
but my camera picked up a "ghost house"...yikes!!


Saturday, November 21, 2015

Pretty Floral

This is my blog post today at

Hi, Diane with you today.

I have been making Fall and Christmas cards like mad
and decided to take a break and make something fancy!


I used paper from The Paper Studio Country Road
as my background and went from there.
I know you can't see it properly,
but I used a beautiful PoppyStamps Crochet Corner die
to place under my flowers.
It is so delicate and pretty.

On top of that I arranged a few flowers from my supplies
along with Mini Rose Buds Pink
A few sprigs from Marianne Designs Anja Leaves 2,
and leaf flourishes from Spellbinders Romantic Vines were added.
To finish the floral bouquet, I used a green bow.


I stamped a sentiment from 
Sweet 'n Sassy Flowers In Bloom stamp set.
The sentiment was punched out and inked with Distress Ink.

I double cut 3 butterflies first from 
then from a dotted vellum using
A bit of bling was added to the butterflies with

Thank you for visiting with me today.

Entering the following challenges:
Word Art Wednesday .... ATG

Friday, November 20, 2015

With Gratitude

What are your plans for Thanksgiving??
Mine are a bit boring!
We go to our Lake house in northern Michigan on Lake Huron
each Thanksgiving.
Not MY choice, but the hubby always wants to go as it is a 4 day weekend
for him and we add on 1 extra day to drive.
I would much rather prefer to stay home with family
but I can understand his reasoning, 
as he takes no vacation weeks,
just days so we can use that lake house.

So I decided to liven up our "twosome" dinner with a couple of cute things
for our dinner table 
(oh yes, I still cook a full Thanksgiving dinner, but on a smaller scale).


I made us a couple pillow box party favors, full of chocolate for our place settings.
Of course the one that says
'beautiful'
is going at my place setting...LOL


I didn't stop there, as I also made a candle wrap to place on the table
in a candle ring.


This was a super, super easy project using the easy cut files from
Now even if we were staying here with family,
I would of made one for each guest as they are so easy.....
just print and cut...
super cute party decorations without spending a million bucks!
The with gratitude file is 100% digital..so easy!!


Make sure and pop on over to The Cutting Cafe blog on the 21st
and see what the other Design Team members have to show you....
LOTS of great ideas there!!

Entering the following challenges:
Digitally Sweet  (m).... It's All About The Title
Jo's Scrap Shack .... Thankful

Thursday, November 19, 2015

Mini Christmas Scene

This is my post on the 

It's beginning to look a lot like Christmas at
Fabulous Christmas dies to be found there.


I absolutely LOVE this one I purchased.
It is a Sue Wilson Christmas Scene Mini Background die.
This die has five parts.
One of the things I love about it
is the fact, then other then the little Christmas scene,
it can be used year round!

It also can  be used in all the layers
or just a few for a simpler card.
I do recommend using wax paper between the smaller
die and your card stock..just makes it easier to pop out.


I used a not quite navy card stock
to go under the first layer
and a blue glitter paper for the next layer.
I also did a bit of sponging behind the little Santa/Reindeer scene.


I got a bit carried away looking at that cute little die
laying on my creative table
and made 4 quick and cute tags with it.
I have stamped to and from on a punched circle and attached to the back!


Visit us here Monday - Friday for fabulous inspiration
and see more of the dies "in use".

Take a trip over to the Challenge Blog to see even more
inspiring designs by our team....
As long as you there, join in the challenge with us
and you could win some DRU "bucks" to spend!

Thanks for visiting with me!

Diane

Entering the following challenges:
Simon Says Wed. challenge....Christmas
A Snowflake Promise .... Christmas/Winter


Wednesday, November 18, 2015

Retro Christmas Scrap Tags

Ho Ho Ho...lol
Are we getting ready for Christmas yet???
Sure does sneak up on us doesn't it?

One of the things I most enjoy is the wrappings,
even more then the gifts I think.
Sometimes I think the wrappings are far way better then the gift..LOL!!


Each year, my sister, niece, and daughter (and myself) do a countdown to Christmas.
We include my Mom, too, but being 88 we don't expect her to shop!
We buy each other 8 gifts, we shop year round,
then starting Dec 1st, we each get to open a gift a day until the big day...
the 25th!!
We get together on the 3rd of December,
each bring some yummy food...
stuff our faces, then we each open one gift from each other.

Which brings me to what today's post is all about....
SCRAP TAGS!


I always make as many of my own tags for this get-together as I can
and when I saw 
Crafty Secrets Heartwarming Vintage Cuts
they just screamed TAGS to me!!


I am calling them scrap tags, as each and every one was made with
things I had previous cut and not used, snippets of ribbons I couldn't
make myself throw away, and bits and pieces of scrap papers!

Some of tags open like these will....
with the 'To and From' inside


Here are a few more I made....
There are 10 in total made from just one printed sheet!


 Look like fun?
Head on over to Crafty Secrets and take a peek at all
the wonderful selections available for Christmas....
make some tags of your own...
they make your gift giving even more special!

Entering the following challenges:
Crafty Gals Corner .... Scraps
Digitally Sweet .... All About The Title

Tuesday, November 17, 2015

Being Thankful

This is my post on the Classy Cards 'n Such blog today
for this weeks challenge with is "Thankful"
and using the inspiration photo below.
You are welcome to use my discount code
DIANE-10 anytime to save 10% on your order.


Hi, Diane with you today.

Our challenge for this week is Thankful.
November is the perfect time of the year
to look back and be thankful for all we have,
and I don't mean material things either.
I mean family, loved ones, our health and to
be able to live as we do,
so very thankful for that!!


I love the elegance of this card.
I started by cutting 2 Impression Twig Wreaths.
One from Super Gold Metallic card stock
I slightly offset one from the other.

A bow was cut from the same paper I used for the sides,
using Finishing Touches Filigree 3D Itty Bitty Bow


The sentiment was stamped from JustRite Thank You Daffodil set.
I paper pierced around the punched oval with
Crafters Tools by Cheery Lynn Designs.
I also used these tools to help with poking out the
intricate design of the bow.

To finish Le Creme pearls were added.

Thank you for visiting with me today.

Etering the following challenges:
Crafty Sentiments .... ATG
Cuttlebug Mania .... Thanks/Thankful
Shopping Our Stash .... Thanks