Sunday, April 30, 2017

Sparkle N Sprinkle May Reveal

Welcome to the Sparkle N Sprinkle
 May Reveal Blog Hop!


NEW STORE - NEW BLOG - NEW PRODUCT LINES!

There are EIGHT new rubber stamp sets being released this month, plus a new Digi Papers set, and two huge Digi Bundles.

The sets are:

840 - Happy Flowers  
(digi version DIGI840FS - see below)

844 - True Beauty  
(digi version DIGI844B)

845 - Girlfriends Support Set 3  
(digi version DIGI845BG)

846 - Flower Girl-Magic in You  
(digi version DIGI846BG)

847 - Kaitlyn Mermaid  
(digi version DIGI847LS)

848 - Rory Batter Up  
(digi version DIGI848LS)

849 - Graduation-Final Roll Call  
(digi version Digi849-850B - see below)

850 - Graduation-Party Time  
(digi version  Digi849-850B - see below)


Digi849-850B - Graduation Bundle (combines both sets plus includes additional images)

Digi840FS - Happy Flowers Bundle (includes additional images, decoupage sheets, digi papers)

Digi4004FS - Rainbow of Pastels Patterned Paper Pack (Digi Papers)


The new sets are 20% off until May 3, 2017, so after the blog hop, hop on over to the NEW STORE and have fun shopping - be sure to check out the OTHER amazing new products as well! 


Be sure to check out the new SNS Blog, which can be found here!


On May 3, ONE GRAND PRIZE WINNER will be selected from the comments left on all the Designers' blogs listed below.  Please leave a comment with each designer to be eligible for the Grand Prize (checked for compliance).  The Grand Prize Winner will be announced on the SNS Facebook page and the SNS New Blog.  


Also, when you purchase the digi versions of any of the SNS rubber sets, you are getting lots of extras that aren't available otherwise.  These extras include additional images not available with the rubber version, digi papers (in some cases), and now a cut file to use with your electronic cutting machines will also be included with all digi images purchased!

You're definitely going to want both the rubber versions as well as the digi versions of all our new releases.


The new sets are 20% off until May 3, 2017.  So once you finish the blog hop, head on over to the New Store and start shopping.

On May 3rd, ONE GRAND PRIZE WINNER will be selected from the comments left on the Designers' blogs listed below. Please leave a comment with each Designer in order to be eligible for the Grand Prize.  You never know who the Mystery Designer will be that has the winning comment.

The Grand Prize Winner, which will be announced on the SNS Facebook page and the SNS New Blog, will receive ALL of the new rubber stamp sets revealed this month.


The Blog Hop Order this month is:

Jess
Belinda
Anne
Diane
Eret
Shona
Donna
Chris

(*Tip: if you have difficulty with a particular link, try clicking on the Designer's blog title to send you to their Home page.)


We hope you enjoy the New Reveal Blog Hop as much as we do.  Thanks for joining us and remember to comment on each of the Designers' blogs to be eligible for the Grand Prize.  
 Wonder who the Mystery Host will be this month????


Have you checked out the SNS YouTube Channel featuring Demo Donna?  If not, then you are in for a real treat.  Subscribe today to get all the latest Demo Donna tips and techniques!


Here is my card for the reveal!


I made this beautiful, but easy 'flower pot' card!

You will need to cut a piece of card stock 3 1/2" x 9".
Score as shown at 2"and 5 1/2".


Fold along score lines as shown and using a border die or punch
cut decorative edge along pot front flap.


Flip the front flap (decorative edge) up and place in a paper trimmer
with 2" score line lined up with the cutting track 
and the 5 1/2" fold line on the 1/2" mark on the trimmer.
Cut making the pot shape.  You will need to do this for both sides.
If you want to make sure you have the cuts exactly lined up on both sides,
you can also trace the cut off piece onto the opposite side, then just cut along trace line.
You should now have a 'perfect' pot!


start rubbing it on your pot front only.
(I used my 'finger' tool...it washes off easily)!


Now you have a nice 'patina' on your pot!


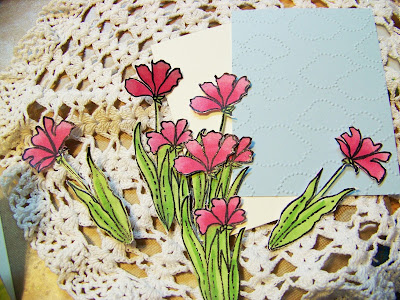
Using Happy Flower set, stamp several times with Versamark,
emboss with Black Detail embossing powder,
and color in with Copics.  Fussy cut the flowers out.
Add a back piece to your flower pot inside the pot (approx 3" x 3")
I added a white base, then embossed with a cloud embossing folder
on a blue card stock.
Arrange the flowers where you want them,
then carefully add Tear-ific Tape 1/2" across them to hold flowers in
and to adhere front of flower pot to them to close.


Using Brushable Glue, add Mauvelous glitter to the flowers and
Margarita glitter to the leaves.
I also stamped a butterfly from the Corner Garden stamp set,
and added Orchid glitter to it.


Once again using Versamark, stamp the sentiment and emboss with
Key Lime embossing powder.
Add your ribbon and tie on your sentiment with twine!

A couple different options is to have a 'pull out' piece from the
flower part and stamp a sentiment on it
(I opted to totally adhere mine down)
or
do as I did and stamp a message (sentiment) on the back.


Next on the hop is the very talented Eret...
make sure to visit all the designers and leave a comment
for your chance to win the entire MAY release!
(all links are listed below for your convenience as well in the body of the post)


Entering the following challenges:
Cardz 4 Gals .... Shaped Card


Stamps:  Happy Flowers #840,
Corner Garden  #842 (butterfly)
Glitter:  Mauvelous G1100,
Orchid G1097, Margarita GM2032
Embossing Powder:  Key Lime EP219,
Other:  Versamark VM001,
Other:  Ribbon, Twine, Scallop Punch,
 EB folder (your choice)
Technique:   Flower Pot card

Saturday, April 29, 2017

Happy Pink Birthday

Happy Pink Birthday says it all
as this card is all pink!

I used a darker pink designer paper and a 
Tutti Designs Stitched Nesting Oval to
cut out an oval from the paper.
(I can use the oval die cut on something else later)


I found that the Happy Birthday Oval
fit darn near perfect inside the cut out!
I added a little bit of a stardust pen inside each little circle (dot).

A few 'candi's' were added and a pretty bow,
once again with ribbon from the RRR club.
The inside sentiment says
'May your day be filled with joy'.

Entering in the following challenges:
Seize The Birthday .... ATG Birthday
In The Pink ... Birthday (pink of course)

Friday, April 28, 2017

Get Well

Rain rain go away
come again some other day!
We have had rain and six days of it total...to end on Tuesday...hopefully!
I will say we are very 'green' out though 
and the hubby is already complaining about the grass mowing!

Today I have a 'Get Well' card to share,
a very 'simple' get well card!


I have to admit, I haven't made many get well cards in my card making days,
I don't want to admit this is the first one, but it very well could be...
shameful, I know LOL!!

This was created very simply by using a background paper
that I rounded the corners on and  using the
Tutti Designs Swirly Get Well die.

I added a dragonfly from my stash of very OLD scrapbook supplies.
He really is a handsome dragonfly as he has real wire antennas,
beads on his wings and is 3D!
See ya tomorrow!

Entering the following challenges:

Ooh La La Creations .... Get Well

Thursday, April 27, 2017

Love

Today it's all about 'LOVE'!
Funny, but I was looking around my creative room
and all it's messy contents and thought
'I LOVE my room'
I LOVE all the stuff in it
and
I LOVE what I do!!!
It just makes me happy happy!!


So, all that being said, today's car is also all about 'LOVE'!

Card stock base is white, matted with a black card stock on top.
I added a black and white designer paper from Authentique.

I die cut a pretty lacy  die from a white shimmer paper
(sorry can't remember which die it is)
and a red metallic heart using Tutti Designs Love Heart.

I added a bow using ribbon once again from 
Really Reasonable Ribbon.
So how do I make my bows?  I cheat...lol...
I purchased this.

Entering the following challenges:
Mod Squad ... Love

Wednesday, April 26, 2017

The Sisterhood Challenge The Letter "B"

Welcome to a new challenge starting today at 

Terri is our hostess and she has chosen the theme
'The Letter 'B'".

Now I had all kinds of ideas for this one
rather then the normal thinking of butterflies or birds...lol.
But darn if I didn't go with a butterfly (and blue)
for 'my' letter "B'.


The frame and the butterflies were pretty rejects from another project using Memory Box Butterfly Exhibit, I could cut 20 of these and never get tired of them!
They somehow ended up laying together and they
just seemed to work so well together.


I added a few sequins and a stamped sentiment.

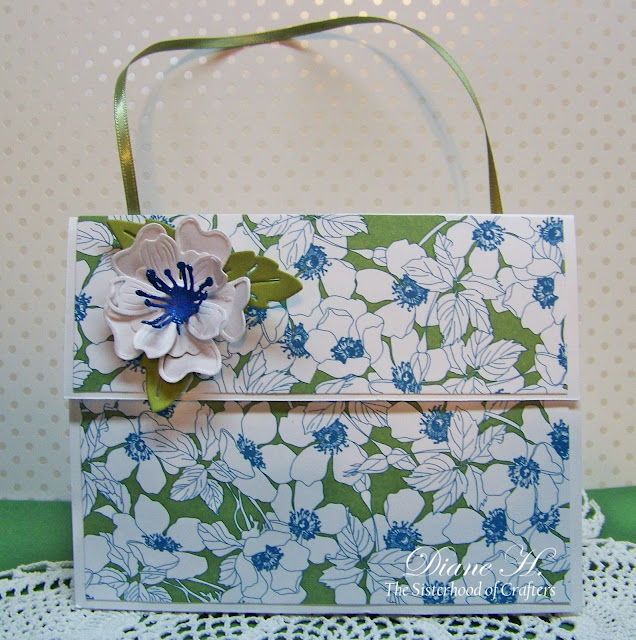
In addition to my card I have a cute little gift 'bag'
in matching papers to my card.


It is extremely simple to make by just using a small white
bag (can be found at craft stores) and designer paper and ribbon.


The bag can be decorated any way you like...simple OR fancy.  I made a flower using a Spellbinders die and
Denim glitter from Sparkle N Sprinkle.


I used a little velcro dot to close it with.
A great little gift for 'Mother's Day'!!!

If you would like to make one of your own, 
I made another one HERE with the instructions.
Make sure and visit my 'sistah's at The Sisterhood to see all their
FABULOUS inspiration!

Entering the following challenges:
Memory Box .... Mother's day
International Art and Soul .... Wings
Simon Says Wednesday .... ATG
Crop Stop ....ATG/Product In Store (Memory Box)
All Sorts .... I Spy "B" Butterflies, blue, beautiful


Card Products Used:
Dies:  Memory Box Butterfly Exhibit
Designer Paper:  SU
Stamps:  Hampton Art

Guest Designing at Word Art Wednesday Today

Today is my second (and last) post guest designing at
I want to thank Karen and the team for having me...thank you!!


Using the scripture provided,
I printed it and die cut it with a Spellbinders Decorative Labels Eight
on cream card stock.

The background papers are from Papermania French  Lavender collection.
These I die cut with another SB die 'A2 Curved Matting'.


The flowers were already cut and in my stash and from Impression Obsession ,
I added a bit of Nuvo Enamel Drops Apple Green to the centers.
Tiny leaves were used from Cheery Lynn Designs Flourish Leaf Strip.


That about sums it up......
I do have another post up today for The Sisterhood of Crafters,
you can visit it HERE.

Entering the following challenges:
Scrapyland .... Spring Blooms
Unicorn Challenge ....  Petal Power
Crafty Hazelnuts Patterned Paper


Tuesday, April 25, 2017

Happy Anniversary

I tell you one thing, I should never, ever run out of anniversary/wedding cards
with all I have made in the last 3 or 4 days lol!

I really like this one and it would be great for a 'silver' anniversary.


I used a pretty black and white designer paper on top
and a diamond pattern embossing folder on the bottom.
(I thought the 'diamonds' kind of fit the mood...hah!

The ribbon is part of my monthly club ribbon from 
Really Reasonable Ribbon...
my, how I love that stuff, I have tons of ribbon, but I reach
for that ribbon 99.9% of the time.

The sentiment is 'my own' I computer generated it and punched it our
using an SU punch,

Now onto the 'die'!!
It is from the newly released wedding dies for  April from Tutti Designs,
The die was cut from a silver metallic paper, 
and I added a few pearls to finish!

Entering the following challenges:
Simply Create Too .... Anniversary (m)
Really Reasonable Ribbon .... Put A Bow On it

Monday, April 24, 2017

Wedding Dies Released

Yesterday the wedding dies were released at
Tutti Designs and I have a card fr you using one of the new dies


I cut the car from a shimmery white card stock, added gems to the tires.
A strip of designer paper was placed underneath and I ran a
'chain link strip' (dazzles I have had forever) along the top and bottom,
A just married sentiment sticker was added to complete...pretty easy....
 also a good die for a man for a birthday, retirement or Father's Day!

Entering the following challenges:
Crafty Cardmakers .... Pearls and/or Gems

Sunday, April 23, 2017

Holly Blessings


Today on the Sparkle N Sprinkle blog I have a 
'Bounce Sheet Technique'
I think you will find a bit interesting....
pop on over to the BLOG to see how it was done!

For this card I used one of the new April stamp sets


For this project I used 

 1/4"Tear-ific  Tape on all four sides, then sprinkling with Aztec Gold glitter...so pretty!

Stamped the image with Versamark and embossed with Gold Detail embossing powder.
I did the same with the single Holly image, but this time fussy cutting it with Tonic 5" mini scissors.
Both images were colored with Copics.
Sentiment was stamped once again with Versamark and embossed with the Gold Detail embossing powder.


Saturday, April 22, 2017

Roses

Whew!!
I am glad to see the backside of this week!!
Have you ever had one of those weeks where maybe
you should have just stayed in bed the ENTIRE week?
Well, it has been 'that' week for me.
Crazy week where a raccoon has driven my husband and I nuts!
From getting into the feeder we have for the feral cats, dirtying up
their water and damaging the lid on the feeder.
We now have to put it in the garage every night.
Next night the thing is scratching at our slider door of the bedroom at 4am.
To top it off, one of the feral cats had kittens underneath our bedroom
window behind the rose bushes, so it has been trying to get to them..
nasty things are raccoons!
NOT happy about the kittens either, it has been a nightmare,
yesterday it stormed so hard and they almost drowned,
I had to run out in the storm, bring them in and dry them off and
try and warm them up, (they will be 3 weeks today).


There's more LOTs more, but that is just the bit of it.
Well I could tell you where I drove to town to shop
for a bench I saw in the Big Lots ad for outside my kitchen slider
and got out of the car to go in, reached for my purse and had FORGOTTEN it at home!
Or how I drove into town next day with a list of stuff I need,
one being a cartridge for my Dyno Label machine
(hasn't had a cartridge for 2 years)
get home put it in, all happy to use it and the batteries are DEAD
and
I don't have enough on hand....on and on!

Yesterday my morning was spent in a kindergarten class with granddaughter Mena
and today starting 'soon' my morning will spent on the soccer fields.


So today I do have a card to share after all my complaining LOL.

It is a card using the Tutti Designs Swirly Rose Circle die.
This is the 3rd card I have made with this die and is one of my favorites,
not sure why, but I just love these Roses!


A little trick I found that worked pretty good for this die is that a
1 1/4" punch works almost perfectly to place under the Rose,
allowing me to punch the circles in white card stock,
then coloring it in.
I used paper and sequins from my stash of many!

Entering the following challenges:
Shopping Our Stash ..... Roses
Allsorts .... I Spy Beginning with a B (Bow)
My Time To Craft .... Sequins or Buttons